How To Set And Understand Asset Priority In Edgescan?
Edgescan's asset priority system lets you rank assets by importance, streamlining prioritization and risk management.
Version Number: v1.0.2
Published Date: 25 Nov 2025
____________________________________________________________________________
Step 1: Access the Asset List
- Start by accessing your asset list on the Edgescan platform, where you can view all of your monitored assets.
Step 2: Assigning Priority to an Asset
- To assign or modify the priority of an asset, locate the asset you wish to categorise.
- Click on the asset to open its details page.
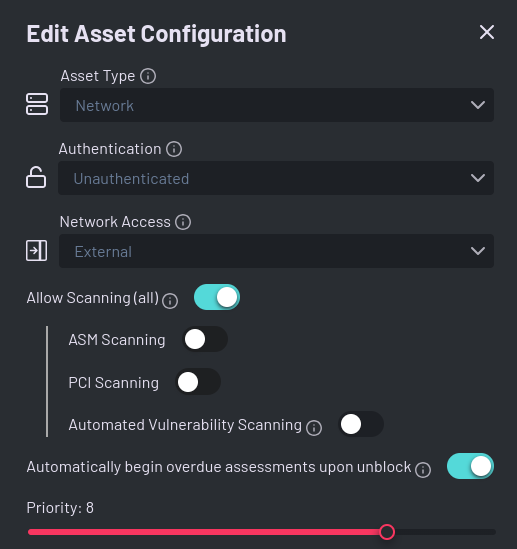
- Click on the "Edit asset configuration" button, located to the right of the "Asset Configuration" text.
- Look for the priority setting option, which allows you to assign a numerical value from 1 to 10.


Step 3: Understanding Priority Values
- This priority does not affect the way Edgescan tests your assets but it may be used to dictate assessment schedules.
- When generating default reports, assets will be listed with their assigned priorities.