Version Number: v1.0.1
Published Date: 13 May 2024
____________________________________________________________________________
Introduction
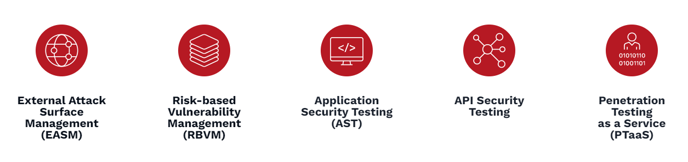
Welcome to Edgescan, your comprehensive solution for managing vulnerabilities across web applications, APIs, and their underlying infrastructure. This guide will introduce you to the key features of Edgescan, such as guiding you through setting up your account, navigating the dashboard, and starting your first vulnerability scan. Edgescan makes securing your digital estate straightforward and effective.
Company Account and User Setup
Company Account Creation by Edgescan: The initial setup of your company account is managed directly by Edgescan. Please coordinate with your Edgescan representative to ensure the foundational settings and permissions are correctly established for your organization.
User Account Creation: Once your company account is active, designated super users within your organization are responsible for creating individual user accounts. This process involves specifying user roles, permissions, and access levels according to your organizational structure and security policies.
Guided User Account Configuration: New users will be guided through a step-by-step setup process to configure their individual account settings. This includes personalization options, communication preferences, and any additional configuration required to optimize the use of the platform.
Verification and Multi-Factor Authentication (MFA): To access their accounts, users must complete a verification process that confirms their identity. We highly recommend setting up MFA for enhanced account security. One-Time Passwords (OTPs) are our preferred MFA method, offering a balance of convenience and security.
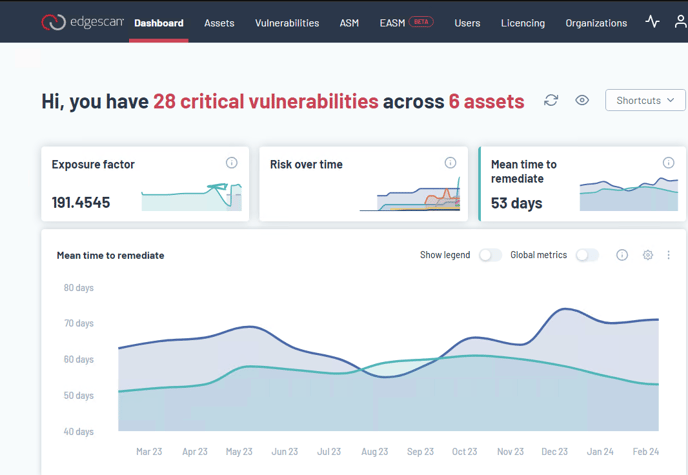
Dashboard Orientation
Upon login, immerse yourself in the Edgescan dashboard's intuitive design. It's your central hub for overseeing assets, pinpointing vulnerabilities, and controlling your attack surface. Crafted for simplicity, the dashboard elegantly organizes vital data, ensuring that mastering one page makes the whole platform accessible.
Creating Other Users
As a privileged user, you'll have the capability to create users for your organization. Assign roles according to the level of access and control required:
|
User Roles |
User Access |
|---|---|
|
Super User |
Unrestricted administration. |
|
Editor User |
Comprehensive access, barring user administration. |
|
Viewer User |
Read-only access to default resources |
Edgescan operates on a resource-based system, managing assets, vulnerabilities, organizations, and more, each with specific permissions.
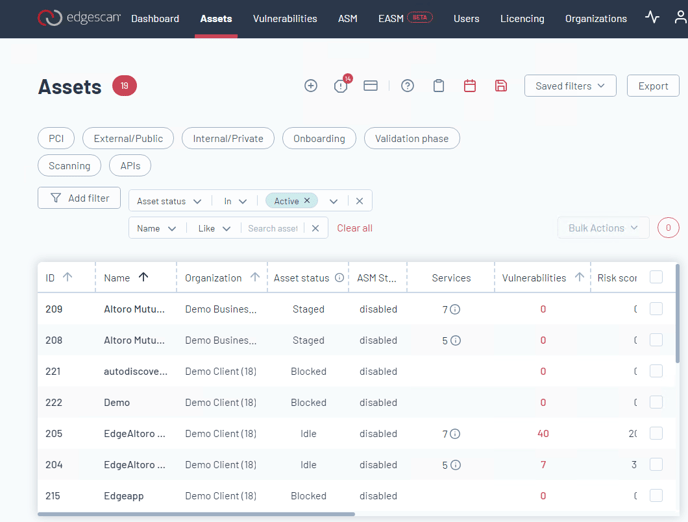
Creating Your First Asset
-
To add an asset, hit the + symbol on the asset page.
-
Provide a URL and hostname, and start your scan at these locations immediately.
-
Alternatively, customize scan settings to meet your organizational needs.
Configure Your Scan
Prepare your first vulnerability scan by setting the scope and exclusions on the Asset page. Understanding the assessment stages helps streamline this process.

-
Name Your Asset: Assign a descriptive name to easily identify your asset within the platform.
-
Select Asset Type: Determine the nature of your asset—be it a network, application, or API—to ensure the scan is appropriately focused.
-
Network Access: Specify whether your asset is accessible externally or remains within an internal network, tailoring the scan's approach to its accessibility.
-
Organization Affiliation: Link the asset to the relevant organization within your Edgescan account, organizing your assets efficiently.
-
Tagging: Apply tags to your asset for easier management and filtering, enhancing your ability to group and identify assets based on custom criteria.
-
Location Specifiers: Define where the host should be located, guiding the scan towards the correct geographical or network location.
-
License Assignment: Choose from various license types available in Edgescan, aligning the asset with the right scanning permissions and capabilities.
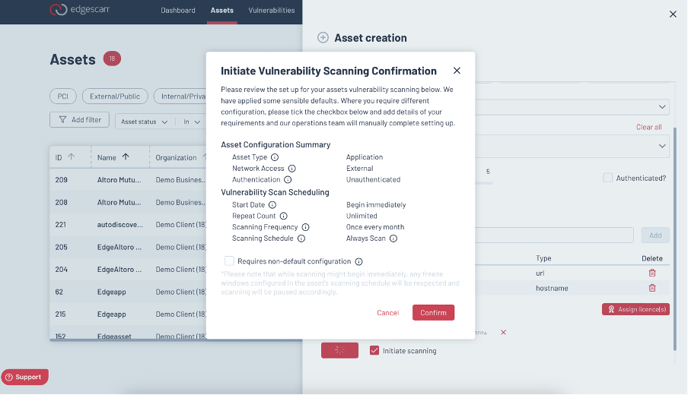
Initiate a Scan
-
To start, press the “start scan” button found on the Assets Calendar.
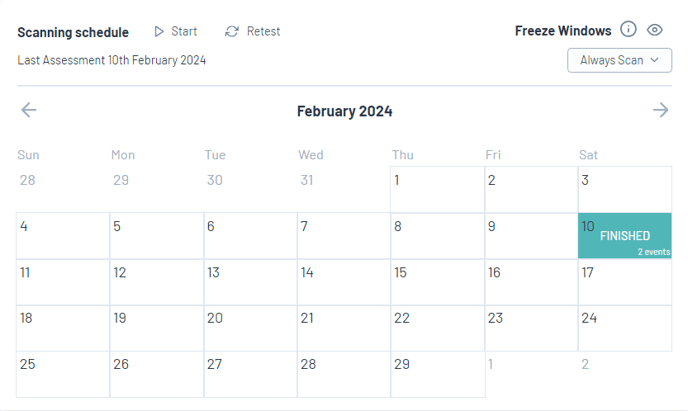
-
Edgescan's automated scanning capabilities will comprehensively assess your web applications and infrastructure.
-
Edgescan automatically sends an email notification upon the completion of your scan, by default.
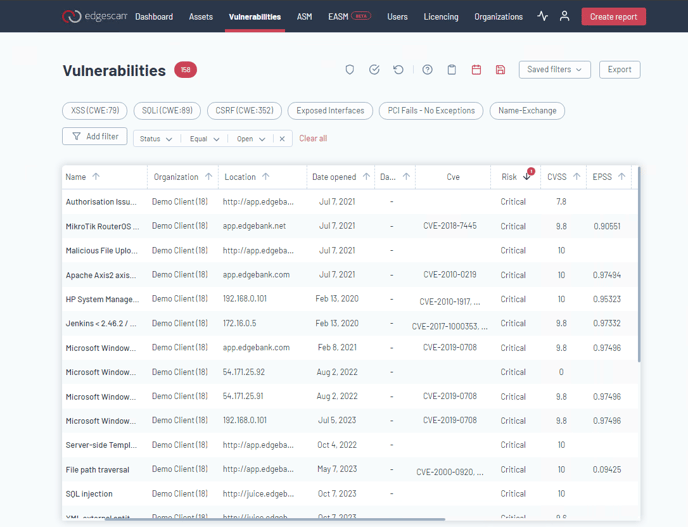
Review Scan Results
Access your scan results on the Vulnerabilities page, where risks are clearly categorized. Utilize filters to prioritize vulnerabilities based on risk level, CISA KEV (CVSS) list, or EPSS score.
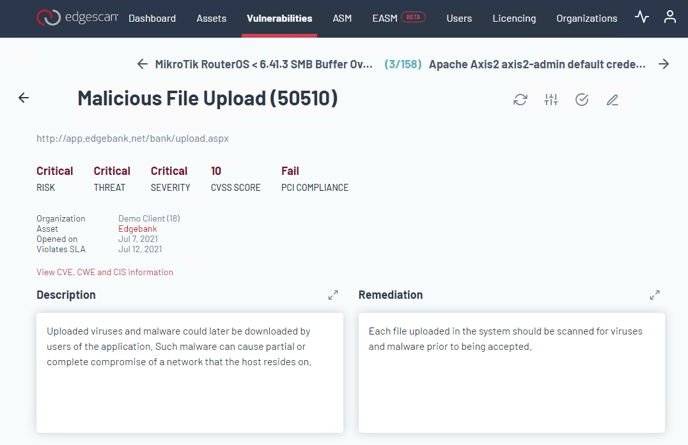
Remediation Guidance
Edgescan offers actionable intelligence for each detected vulnerability. Detailed information and mitigation steps are provided to guide your remediation efforts collaboratively. Once remediation has completed, you can initiate a retest of one or many vulnerabilities in Edgescan.
Integrate Your Workflow
Streamline your security processes by integrating Edgescan with your existing tools and platforms. Detailed documentation supports a seamless integration experience.
Continuous Monitoring
Embrace continuous monitoring to maintain a secure environment. Schedule recurring scans and receive automated reports, staying informed of your security posture at all times.
Conclusion
By following this guide, you're now equipped to utilize Edgescan to its full potential. Our platform is designed to simplify complex security tasks, making vulnerability management accessible and actionable. For further assistance Contact Us directly.