How Do I Assign Permissions To Users?
Access to permission controls is located on the user detail page for a selected user. The users page will only be visible if you have the necessary permissions to manage users, i.e. you are a superuser with administrative rights.
Version Number: v1.0.1
Published Date: 13 May 2024
____________________________________________________________________________

You have the ability to control permissions by granting or denying access to various resources for a selected user. It's important to note that you cannot grant a permission to a user that you do not already possess yourself.
Permissions Table
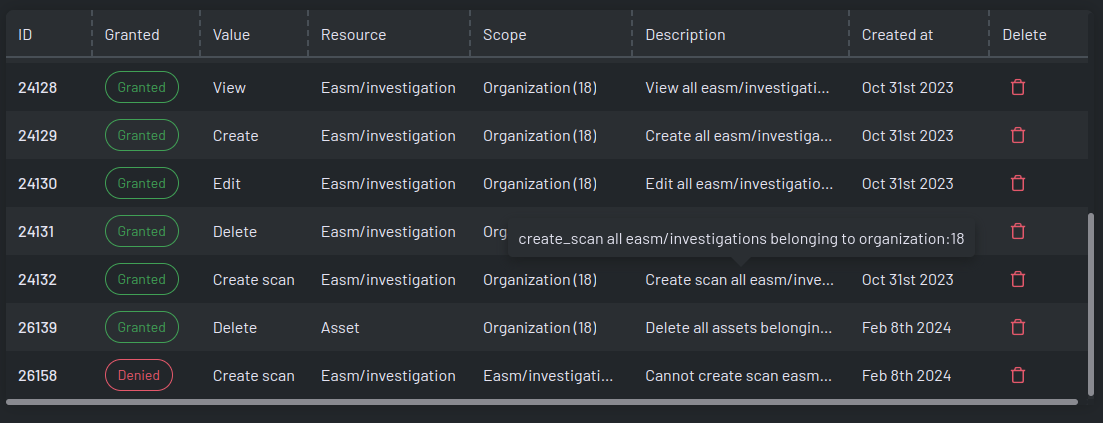
The permissions table provides a comprehensive list of all the permissions granted to a user.
The permissions table provides a clear overview of the permission status (granted or denied), the purpose of the permission, the associated resource, the scope, and a user-friendly description. Additionally, it offers the option to completely delete a permission record with the prominent button on the right-hand side.
Permission Controls
You can use the permission controls to either give or restrict new permissions for the selected user.

Now, let's walk through each aspect of the control using an example.
We have a specific asset called edgebank (id 60) that we wish to grant a user permission to access.
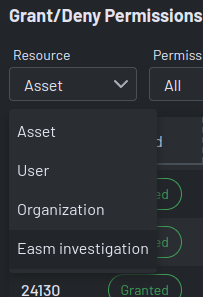
Resource
The resources refer to the items or objects for which you want to assign permissions. In our example, we are focusing on the asset, so that is the resource we will choose.
Permission
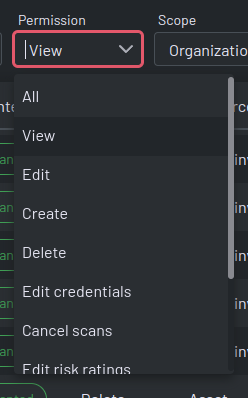
The permission defines the actions a user can take with the resource.
Different resources will have varying sets of permissions that are tailored to their specific needs.
Typically, most resources will have a core set of permissions including view, edit, create, and delete.
View: Allows the user to see the resource. For example, if a user can view the asset "edgebank", they will be able to locate it on the assets index page.
Edit: Enables the user to make changes to a resource.
Create: Gives the user the ability to generate new resources of that type.
Delete: Allows the user to remove resources of that type.
Permissions follow a hierarchical structure that is easy to understand. For instance, if you want a user to have editing permissions on an asset, they must first have viewing permissions for that asset - because you can't edit what you can't see!
In our example scenario, we want the user to have the ability to view the asset, so we will select the view permission.
Scope
The scope determines the extent of the permission granted. By default, the app sets the scope to the user's organization, ensuring that permissions are aligned with the organization's structure.
When setting the scope for permissions, the resources selection on the right will automatically adjust to only show resources within that scope. In our example, we want to be specific and grant access to a particular asset rather than all assets in the organization. Therefore, we select the scope as 'asset' and search for 'edgebank' to select it.
Grant / Deny
This is the action you want to take. In our example, we aim to give the user the ability to view the asset.
In some cases, you may choose to select 'Deny' instead. This option comes into play when a user has permission at a broader level, and you wish to limit their access. For example, a user might have permission to view all assets within an organization, but you may want to restrict their access to a specific asset.
Full Example
After granting the permission, a confirmation message will appear in a notification at the bottom of the screen.

The permission will be displayed in the table for easy reference.
