Version Number: v1.0.1
Published Date: 03 Jun 2025
____________________________________________________________________________
The Edgescan for Jira Data Center plugin is available in the Atlassian marketplace here.
1. Introduction
1.1 Overview
The Edgescan plugin for Jira Data Center provides seamless integration between your Edgescan vulnerability management platform and Jira. This integration allows teams to track, manage, and remediate security vulnerabilities directly within their existing Jira workflows.
1.2 Key Features and Benefits
-
Create Jira issues automatically from Edgescan vulnerabilities
-
Automatically update issue status based on vulnerability status in Edgescan
-
Map Edgescan risk levels to Jira priorities
-
Configure issue types, assignees, and workflow states
-
Maintain synchronisation between Edgescan and Jira
-
Handle moved tickets across projects
-
Manage out-of-scope issues with configurable cleanup options
1.3 Compatibility Information
-
Compatible with Jira Data Center installations
-
Integrates with the Edgescan API
-
Web-based configuration interface
-
Compatible with Jira Data Center versions 9.12.2 through 9.14.0
-
Current plugin version: 1.0.0
2. Installation & Setup
2.1 Installing the Plugin in Jira Data Center
2.1.1 Via Atlassian Marketplace (When Available)
-
Navigate to Jira Administration → Manage apps → Find new apps
-
Search for "Edgescan"
-
Click "Install" on the Edgescan plugin
2.1.2 Direct Installation (Alternative Method)
There are several options for direct installation:
-
Manual Installation in Shared Directory:
-
Place the .jar file in your Jira Data Center shared home directory under plugins/installed-plugins/
-
-
Via Universal Plugin Manager:
-
Enable plugin upload in UPM (requires admin configuration)
-
Navigate to Jira Administration → Manage apps → Upload app
-
Select the downloaded Edgescan plugin .jar file
-
Click "Upload"
-

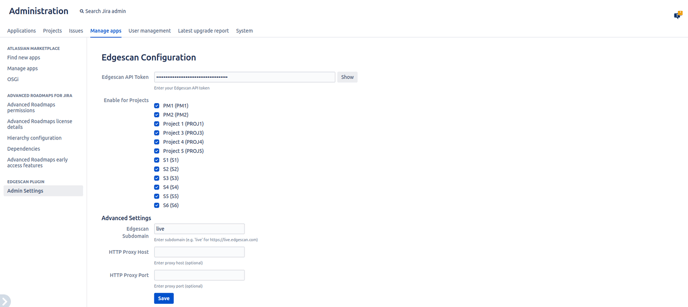
2.2 Initial Configuration
After installation, configure the plugin's global settings:
-
Navigate to Jira Administration → Manage apps → Admin Settings under the “Edgescan Plugin Settings” heading
-
Configure the following settings:
-
Edgescan API Token
-
Enable projects that should have access to the Edgescan integration
-
Edgescan subdomain (default: "live")
-
Proxy configuration (if required)
-
2.3 API Token Setup
To connect Jira with Edgescan, you'll need to provide an API token:
-
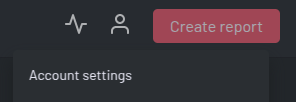
In Edgescan, navigate to Account settings → API Tokens
-
Enter a descriptive label in the Label field
-
Click the Create button to generate a new token
-
Copy the generated token (note: it will only be displayed once)
-
In the Jira Administration, go to the Edgescan plugin settings
-
Enter your API token in the designated field
-
Save the configuration


3. Project Configuration
3.1 Linking Projects to Edgescan Assets
For each Jira project you want to integrate with Edgescan:
-
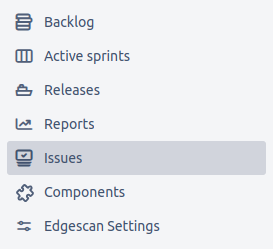
Navigate to the project
-
Select "Edgescan Settings" from the left sidebar navigation
-
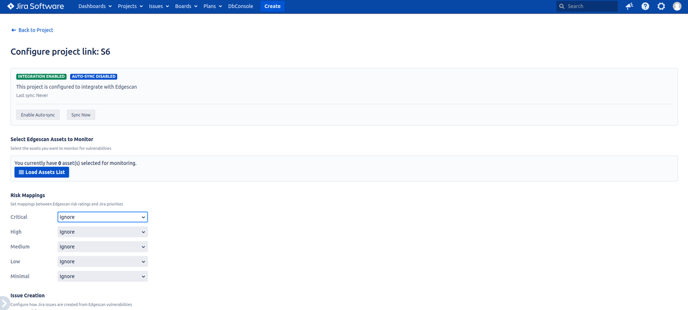
Click "Load Assets List" to view available Edgescan assets
-
From the displayed list, select the Edgescan assets you want to monitor for vulnerabilities
-
Save your configuration
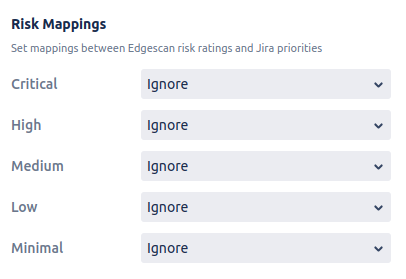
3.2 Risk Mapping to Jira Priorities
Map Edgescan risk levels to Jira priorities:
-
In the project configuration page, locate the Risk Mapping section
-
For each Edgescan risk level (Critical, High, Medium, Low, Minimal), select the corresponding Jira priority
-
If you select "Ignore" for a risk level, issues for vulnerabilities with that risk level will be created without a priority set
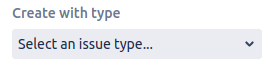
3.3 Issue Type Selection
Configure the type of issues created for vulnerabilities:
-
In the "Create with type" section, select the appropriate issue type (e.g., Bug, Task, etc.)
-
Note: Epic and Sub-task issue types are not available as vulnerability issue types
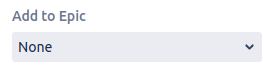
3.4 Epic Assignment Options
Optionally link vulnerability issues to an Epic:
-
In the "Add to Epic" field, enter the Epic issue key
-
All vulnerability issues will be linked to this Epic upon creation
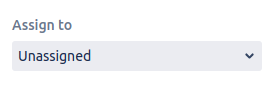
3.5 Assignee Settings
Configure automatic assignment of vulnerability issues:
-
In the "Assign to" field, select a user to automatically assign vulnerability issues
-
Select "Unassigned" if you want issues to be created without an assignee
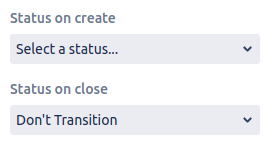
3.6 Status Configuration
Define the workflow states for new and closed vulnerabilities:
-
"Status on Create": Select the status for newly created vulnerability issues
-
"Status on Close": Select the status that issues should transition to when the corresponding vulnerability is closed in Edgescan
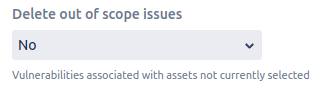
3.7 Managing Out-of-Scope Issues
Configure how to handle issues when their associated assets are no longer tracked:
-
In the "Delete Out of Scope Issues" section, select "Yes" to automatically delete issues related to assets no longer tracked by the project
-
Select "No" to keep issues even when their assets are no longer tracked
Note: Issues that have been moved to other projects or are in a "Done" status will not be deleted, regardless of this setting.
3.8 Vulnerability Status Label Options
Configure whether to display vulnerability status as labels:
-
Enable "Vulnerability Status Labels" to add labels to issues
-
When enabled, issues will be labelled with "EdgescanVulnerabilityStatus:Open" or "EdgescanVulnerabilityStatus:Closed"
-
Labels are automatically updated during synchronisation

3.9 Retest Links
Configure retest links for vulnerabilities:
-
Enable "Enable retest magic links" to include retest request links in issues
-
When enabled, issues will include a magic link to request vulnerability retests
-
Note that these retest links expire after 7 days

4. Using Synchronisation Features
4.1 Manual Sync Functionality
To manually synchronise vulnerabilities:
-
Navigate to the project
-
Select "Edgescan Settings" from the left sidebar navigation
-
Click the "Sync Now" button to start the synchronisation process
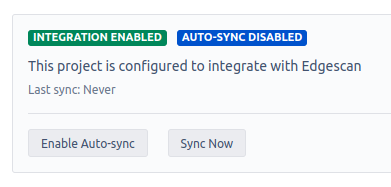
4.2 Automatic Synchronisation
Configure automatic synchronisation:
-
Navigate to the project
-
Select "Edgescan Settings" from the left sidebar navigation
-
Click the "Enable Auto-sync" button to toggle automatic synchronisation on
-
When enabled, the plugin will automatically run synchronisation every 5 minutes
-
The synchronisation runs asynchronously in the background, allowing you to continue working in Jira without interruption
Additionally, the plugin runs a background label sync job hourly to ensure status labels are updated for moved tickets and tickets in projects not tracking their assets.
4.3 When to Use "Sync Now"
Use manual synchronisation in these scenarios:
-
After configuration changes
-
When immediate updates are needed (rather than waiting for the 5-minute auto-sync)
-
After modifying tracked assets
-
For troubleshooting and verification purposes
4.4 Understanding Synchronisation Behaviours
During synchronisation, the plugin performs the following actions:
-
Creates Jira issues for new vulnerabilities
-
Updates existing issues when vulnerability details change
-
Transitions issues when vulnerabilities are closed in Edgescan
-
Adds comments explaining vulnerability status changes
-
Updates status labels (Open/Closed) on issues
-
Handles moved issues between Jira projects
-
Manages out-of-scope issues per your configuration
4.5 Best Practices for Synchronisation
For optimal performance:
-
Schedule major configuration changes during low-activity periods
-
Allow sufficient time for initial synchronisation of large asset sets
-
Verify configurations before synchronising large projects
-
Check synchronisation results in the project's issue list
5. Working with Vulnerability Issues
5.1 Understanding Issue Format and Fields
Vulnerability issues created by the plugin include these key elements:
-
Summary: Vulnerability name
-
Description:
-
Asset details with link
-
Link to view vulnerability in Edgescan
-
Technical details (location, layer, CVSS data)
-
Status and dates (including SLA due date when applicable)
-
CWEs (Common Weakness Enumeration references, when available)
-
Tags (associated with the vulnerability, when available)
-
Retest link with expiration notice
-
-
Type: Configurable
-
Priority: Based on configured risk mapping (e.g., Medium)
-
Labels: EdgescanVulnerabilityStatus:Open or Closed
-
Epic Link: Associated with configured epic when enabled
-
Assignee: Set according to configuration

5.2 Status Transitions
Vulnerability issues transition through different statuses based on their life cycle:
-
Created with the configured "Status on Create"
-
Manually transitioned by users during remediation
-
Automatically transitioned to the configured "Status on Close" when closed in Edgescan
5.3 Viewing Vulnerability Details
Each issue includes links to view detailed information:
-
The issue description contains a direct link to the vulnerability in Edgescan
-
If configured, retest links may be available for issues that require verification
5.4 Working with Moved Tickets
The plugin handles moved vulnerability issues with specific behaviours:
-
Link maintenance: Issues moved to another project maintain their link to the Edgescan vulnerability
-
Database updates: The system automatically detects moved tickets and updates internal records
-
Status labels: Labels (EdgescanVulnerabilityStatus:Open/Closed) continue to be updated hourly even if the new project doesn't track the asset
-
Workflow status transitions: For actual status transitions to occur, the new project must:
-
Have Edgescan integration enabled
-
Track the specific asset associated with the vulnerability
-
Have appropriate status transition configuration
-
Run a synchronisation operation that processes the vulnerability
-
-
Deletion protection: Issues moved to other projects are protected from deletion even when the original project stops tracking the asset
-
Assignee preservation: When status transitions occur, the plugin attempts to preserve the original assignee
This implementation ensures that moved tickets maintain their relationship with Edgescan vulnerabilities while respecting each project's configuration.
6. Frequently Asked Questions
6.1 Common Questions
Q: Which user creates the Jira issues?
A: Issues are created by:
-
The "edgescan-plugin" system user during automatic synchronisation
-
The logged-in user (like Admin) during manual synchronisation via the "Sync Now" button
The edgescan-plugin is a system user automatically created during plugin installation with administrative permissions. This special user performs numerous automated actions including:
-
Updating vulnerability status when closed in Edgescan
-
Adding comments about vulnerability status changes
-
Applying and updating status labels (Open/Closed)
-
Transitioning issues through workflow states
-
Deleting out-of-scope issues when configured
-
Adding issues to epics when configured
-
Performing background label synchronisation for moved tickets (runs hourly)
In all cases, "Edgescan Plugin" appears as the Reporter field on issues, though the activity history will show who actually created or triggered actions on each issue.
Q: What happens if I delete an issue created by the plugin?
A: The plugin maintains a database linking Jira issues to Edgescan vulnerabilities. When an issue is deleted, the plugin retains this database record. During subsequent synchronisations, the plugin will detect that the issue no longer exists but will not recreate it, as the current implementation treats deleted issues as if they might have been moved to another project. To have the vulnerability tracked again in Jira, you would need to remove the link from the plugin's database via administrative tools.
Q: What exactly happens when I move an issue to another project?
A: When you move an issue to another project:
-
The plugin detects that the issue has been moved
-
It updates its internal database to reflect the new project location
-
Status labels will continue to be updated for the issue, even in its new project
-
If the original project disables tracking of the related asset, the moved issue will not be deleted
-
For actual workflow status transitions to occur, the new project must both track the asset and run a sync operation
-
All synchronisation operations will use the new project's configuration settings, not the original project's settings
Q: Can I have multiple projects tracking the same asset?
A: Yes, multiple projects can track the same asset. Each project will have its own issues for the asset's vulnerabilities.
When multiple projects track the same asset:
-
Each project creates and maintains its own separate Jira issues
-
Each project applies its own risk mappings, issue types, and project-specific settings
-
Updates to vulnerability status in Edgescan will be reflected in all linked projects during their respective syncs
-
Deleting an issue in one project won't affect issues in other projects
-
Moving an issue between projects is tracked by the plugin, preventing duplicate issues
6.2 Troubleshooting Tips
Issue: Synchronisation not creating expected issues
-
Verify API token has correct permissions
-
Confirm the asset is correctly selected in project configuration
Issue: Status not updating on closed vulnerabilities
-
Verify the workflow allows transition to the configured "Status on Close"
-
Check for both direct transitions and global transitions in your workflow
-
Ensure there are no validation rules blocking the transition (required fields, etc.)
-
-
Check that the issue hasn't been manually moved to a status that blocks transitions
-
When status transitions fail, the plugin will still add a comment indicating the vulnerability is closed
-
The plugin attempts to find all possible transition paths but can't override workflow restrictions
-
-
Confirm the project has Edgescan integration enabled if the issue was moved between projects
Issue: Issues being created without expected fields
-
Review Epic, assignee, and other configuration settings
-
Check that Epic Link custom field is properly installed and available
-
Verify correct Epic key format is being used
-
-
Verify that any referenced users or issues (like Epics) exist and are accessible
-
Confirm users haven't been deactivated or renamed
-
Confirm Epics haven't been deleted or moved to different projects
-
-
Check project configuration for any required fields
-
Some fields may be required by your Jira workflow that aren't being set by the plugin
-
6.3 Expected Behaviours
-
First synchronisation after configuration may take longer, especially for large assets (due to initial retrieval of all vulnerabilities). When using the "Sync Now" button for a first-time sync of large assets, the operation will process in real-time and the page will appear to be loading until completion. Upon completion, you'll see a confirmation message with the number of vulnerabilities found
-
Issues in "Done" status will not be deleted even if their asset is no longer tracked
-
When the original project stops tracking an asset, moved issues continue to receive label updates but not workflow transitions (this preserves the integrity of issues in their new projects)